Data Importer
In This Topic...
The Data Importer feature is designed to facilitate the management of large amounts of data at once, within the Oceanwide Marine Suite. Note that at this time, booking shipments is the only transaction available.
A short description of fields and action buttons are provided within the document. If you require additional information about a field or action button, refer to the Glossary.
Navigating the Data Importer
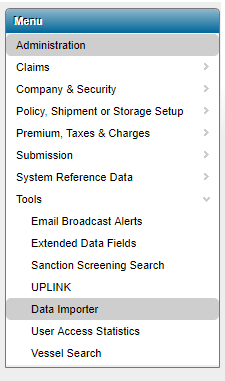
Upon logging into the Oceanwide Marine Suite, the Data Importer is available from the Tools menu under Administration.

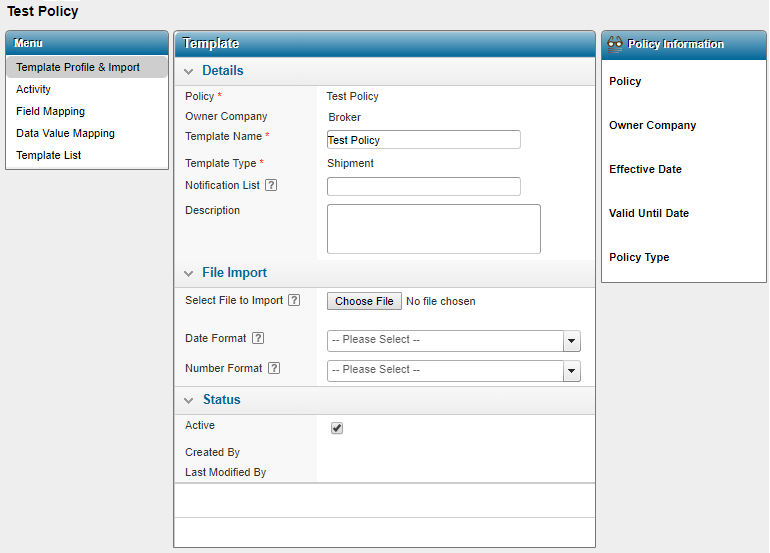
When the user clicks on the Data Importer option, the Template List is displayed.

Clicking on the View Details link will open the Template page. From here, users can navigate through the different sections of Data Importer. See the screen layout section below for details.

Screen Layout

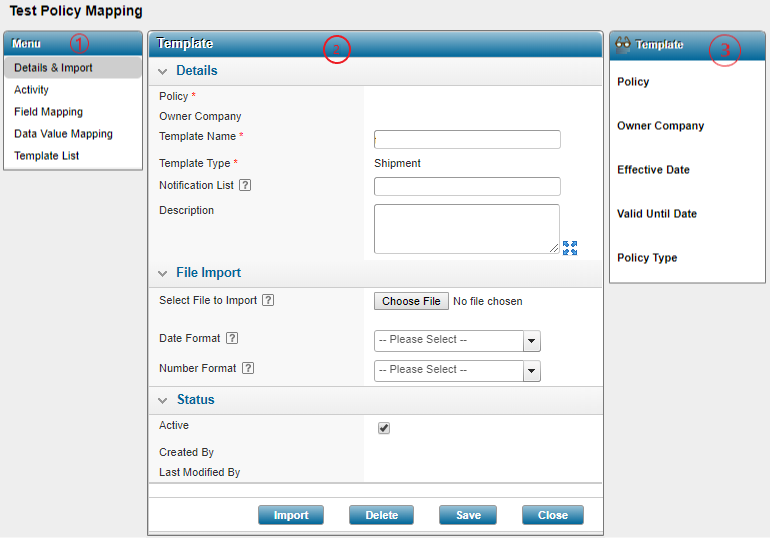
1 - Menu Widget: This side menu widget acts as a navigation window to the other sections of the Data Importer module.
| Template Profile & Import |
Provides overview details of the Template the user has configured. Users with the appropriate security rights can manage the details of the selected template, as well as import new files in order to update the template. Click here to view the Template details page. |
| Activity |
Displays the list of imported files with details on the Process Type, the Date submitted, how many items were successful or failed, and options to view the original file and download it. Click here to view the Activity Review module. |
| Field Mapping |
Displays the list of system fields that are mapped through the import, based on the Policy Setup. Click here to view the Field Mapping page. |
| Data Value Mapping |
Allows the user to view and manage the value mappings of the fields mapped in the Policy Setup. Click here to view the Data Value Mapping page. |
| Template List |
Displays the list of available Templates that were imported via the Data Importer feature. Click here to view the Template List page. |
2 - Details: The center of the screen displays the details of the section selected from the main Menu on the left. The display of this section varies, depending on the section of the module being viewed.
| Status |
The Status panel displays the status of the template, either Active or Inactive. This section also displays information such as the date and time the template was created, the last time it was modified, as well as the user who created and/or modified it. |
| File Import | The File Import panel is used to upload the Excel sheet that includes the column headers used for Field Mapping into the Template profile page. |
| Action Buttons | The bottom section of the page includes action buttons. These buttons may vary depending on the logged-in user's security rights. |
3 - Information Widget: The information widget displays the details of the template being viewed, such as the Policy it is associated to, the Owner Company of the policy, Effective Date and Valid Until Date, and Policy Type.
Template Profile Page
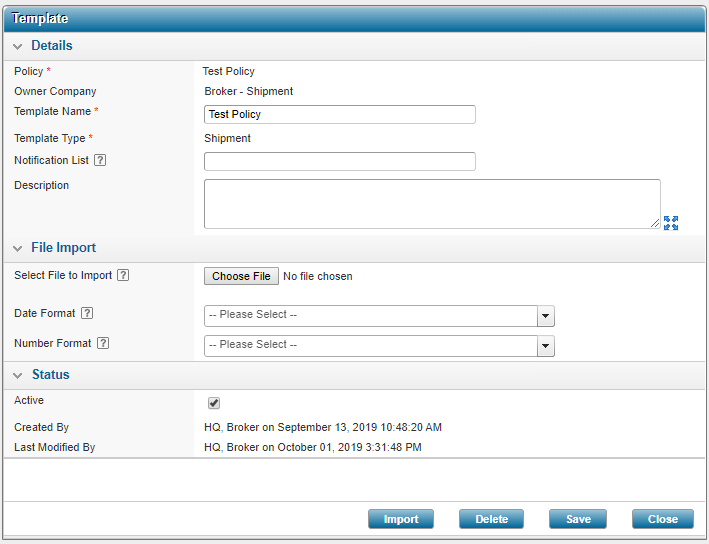
The Template Profile page displays the details of a given template. A description of each field follows below.
Note that fields marked with a red asterisk * are required when creating a template.

| Field | Description |
| Policy |
Select a policy for the template. Note that templates cannot be associated to multiple policies. The policies available are based on the policies the logged-in user has access to, within the organizational hierarchy. |
|
Note: Once the policy is selected, the fields returned will be from the latest policy at the time the template is created. |
|
| Owner Company | Select the company who will own the template. This value determines which reference data from Company, Employees, and Administration is available for the template. |
| Template Name | Enter a name for the template. This will identify the template within the Template List. |
| Template Type | Select a template type. Note that only Shipment is currently available. |
| Notification List |
Email addresses specified here will be sent an email containing up to two attachments (processed files) each time an import completes. Addresses must be comma separated. For example: john.smith@work.com,janedoe@theoffice.com |
|
The Notification List configured is used by the system to send Import Completion files once the excel sheet has been uploaded. Users should receive the following spreadsheets, where applicable:
|
|
| Description | Enter a description for the template. |
| Select File to Import |
Select a file in .xslx or .csv format to be imported. The first row must contain the column headers based on the Field Mapping screen configuration. Each subsequent row will be categorized as a unique shipment. |
| Date Format |
This field is used when importing the excel file. Select the format of date values within the file to be uploaded. |
| Number Format |
This field is used when importing the excel file. Select the format of numeric values within the file to be uploaded. |
|
Note: The Date Format and Number Format selected when importing the file are saved with the template until the next time they are modified. Users should always verify the Date Format entered in the excel file to be uploaded, prior to import. |
|
| Active | The active checkbox is pre-selected when creating a new template. To deactivate the template, uncheck the Active checkbox. |
| Created By | Displays the date and time when the template was created and the name of the user who created the template. |
| Last Modified By | Displays the date and time when the template was last modified and the name of the user who modified the template. |